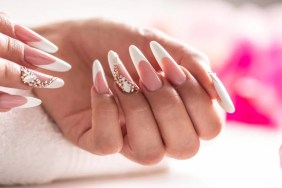
Anyone who has tried nail art at home knows it can be a tricky and all too often disastrous endeavour. With practice, and more importantly lots of time, it can be mastered but we can all agree the nail is an imperfect canvas for art. That said, it doesn’t mean you’re stuck with plain tips forever. There are many ways to jazz up a traditional manicure beyond a standard French, but one of our favorites is the negative space mani. It’s not just Pinterest addicts and nail art aficionados flocking to this trend, designers such as Lela Rose, Zimmermann and Opening Ceremony have picked up on this trick on the runways. This simple nail art alternative can take many shapes and forms and is only a bit more complicated than your everyday paint job.
Color choice is almost as important as shape with this look. You may want to try sheer or nude tones but in our experience, working with brights or saturated colors is the best way to get a crisp line and polished finished product. Before you start, decide what shape or shapes you want on your nails. Nail stickers or even paper reinforcements act as perfect guides for shapes such as half moons or stripes. You can also get creative with tape, but be sure it’s the invisible style or painters tape as it will be easier to lift. Also, think about what you can do with your unpolished space. Nail art brushes or pins can be used to add dots and extras to your design.
To get this look at home, it’s important that your nails are in the best condition possible, so file the tips and push back your cuticles. Prep your nails with a base coat and let it dry completely. This is important otherwise you’ll lift the polish when you finish. Next, place your stickers where you wish and paint two coats of your chosen color across the area and let set for a few minutes (three or four usually works) then remove the sticker. There is some discussion about letting the shape dry completely before removing the tape but you risk lifting the polish with it so we suggest acting slightly earlier. If necessary, you can clean the edges around your cuticle using a small cotton bud or brush dipped in removed. Seal your finished look with a top coat and you’re done!