This spring, one of the most beautiful actresses in the world is going to make her way onscreen in what, no doubt, will be another classic Disney film. And while we’re anticipating the special effects, the drama and seeing one of our favorite fairytales reimagined, we can’t help but be even more excited by the striking beauty looks that will also be on display. We’re talking about Angelina Jolie, of course, in Maleficent (in theatres May 30), the untold story of Disney’s most iconic villain from the classic Sleeping Beauty.
One look at the trailer and you can see she’s made up to look every bit the striking villainess, wielding power through magic and those gorgeous, glossy red lips. We’re betting not a few of us will be giving our matte reds a break to try a more glistening ruby effect, which is why we’re about to tell you the best way to achieve it. This step-by-step process will take some time, but as they say, Rome wasn’t built in a day. Perfection requires a touch of patience, but is so worth it.
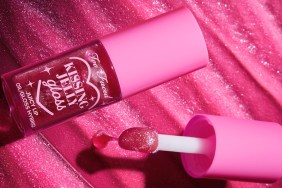
What You Need: It always helps to gather your tools in advance, so round up the following: A flat angled brush, a lip brush, concealer, foundation, lip balm, clean soft bristled toothbrush, tissues, as well as translucent powder and powder brush. Of course, you’ll also need the right color lip liner and lipstick. An optional addition is clear lip gloss.
Getting the Color Right: Not every red is meant for every lip. Look out for warm-toned reds if you have olive skin (your veins on the underside of your wrist have a green or yellow cast). Look for cool-toned reds if your veins look blue or purple. You can tell the difference by comparing two lipsticks side-by-side. Warm-toned colors will have an orange-based undertone while cool-toned reds have a blue base. If you’re not sure, ask an employee at the makeup counter to help you. Chances are you’ll be able to test one or two shades before you buy. Focus on satin finishes as opposed to matte. The satin finish has a slight sheen to it that provides for that shine. Find a complementary lip liner that’s as close to the color of lipstick you choose as possible. Now you’re ready for application.
The Steps:
-
Exfoliate Your Pout — If your lips are chapped or uneven, run a toothbrush gently over them. This exfoliates and removes dead skin.
-
Moisturize — Apply a lip balm to your kisser. Wait 10 or 15 minutes for it to absorb and do its work.
-
Apply the Base — For color that stays throughout the night, apply concealer to your lips followed by foundation. Blend both well. This creates a sticky layer for lipstick and liner to adhere to. Think of it like velcro for your color.
-
Outline Your Lips — Next, dip the edge of the flat angled brush into your concealer and apply to the very outside edge of your lip line. Top and bottom. Blend well. This highlights your lips making them look more defined and bigger.
-
Color Inside the Lines — You’re ready for your color. As we stated in this article, use your lip liner to create a guideline for perfect application. Make an “X” at the bow of your top lip. The top of the “X” should be a “V” that starts at each crest and ends in the center of your top lip. Next draw “<” at the left corner of your mouth, one mark for each lip. Repeat on the other side, drawing this “>”. Use your marks to draw a complete line around the inside edge of your lips until they are fully lined. Once the inside edge is covered, fill in the entire surface of your lips with your lip liner.
-
Apply Your Lipstick — Apply your lip brush to your lipstick and start filling in your lips with the color. Yes, this part is tedious. Yes, it takes longer than directly applying the lipstick, but it’s the best way to ensure perfect application.
-
Blend, Remove Excess and Powder — You’re in the home stretch! Gorgeous, glossy lips here you come! Press your upper and lower lip together to blend color and give it uniformity. Open your mouth wide and make sure you’ve gotten completely into the corners. Take a tissue and repeat pressing lips together, with the tissue in between them to gather excess color. Take a new tissue and press it gently over lips. Now apply translucent powder over the tissue with the powder brush. The tiny pores in the tissue will allow the perfect amount of powder to be transferred to your lips, providing extra staying power.
- Gloss if You Wish — You’re done, if you want to be. But we recommend carrying a clear lip gloss with you if you’re about to go out on the town. This way you can refresh the shiny texture in a snap without having to reapply color. And because you used lipstick, and all measures to give it staying power, instead of merely red lip gloss, you can expect that color to ride out your night right along with you.