Whether you’re into the scary or sweet side of Halloween it’s fun for us beauty lovers to get in on the fun and one of the easiest ways to do that is with a themed nail look. This is especially true if you’re dealing with sensitive skin and aren’t into the idea of painting your face with heavy costume makeup.
With that in mind we turned to Rianna Basurto, marketing associate at Bellacures, and asked her to share with us her top three favorite Halloween nail designs.
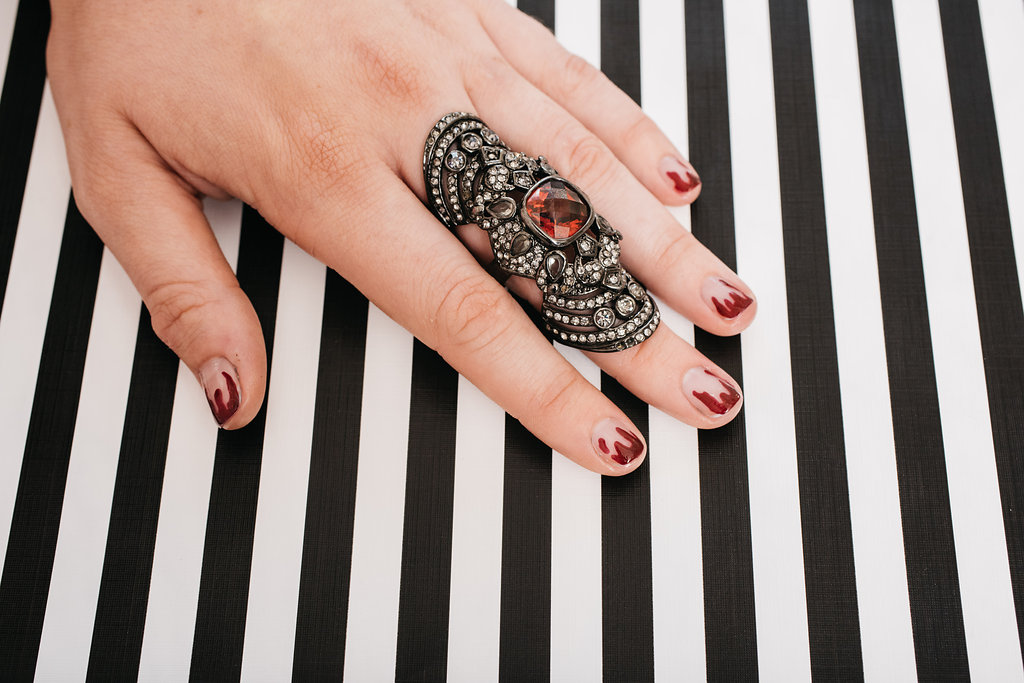
Red Blood Drip Design

“Begin by taking your favorite opaque nude or off white polish and apply one coat evenly to each of your nails – we recommend going with a polish shade that best suits your skin tone. Once your nails are dry, have your favorite dark red polish on hand. We will use it to create this blood drip design, for this look we used Essie Oxblood. Other great dark red polish options for this look are, Essie Bordeaux, OPI Como Se Llama, and Dazzle Dry Fast Track Cherry.
To make this design easier to execute, we recommend using a nail dotting tool to begin to place red dots onto the nail bed. These dots will ideally be placed where you would like the blood drips to end. You can have a little fun with this and vary these dots from nail-to-nail, since we are not wanting these drips to be uniform looking. From here, begin to drag up the excess color from the dot with a thin line brush. These lines do not have to be straight by any means, and are better if they are a little messier on the way up. Once you have the look dragging up, connect these blood drips from side to side along the top portion of your nail. After your drips have been formed to perfection, fill them in with your dark red polish to achieve the full effect! Finish off with a top coat.”
Black and White Pinstripe Nail Design
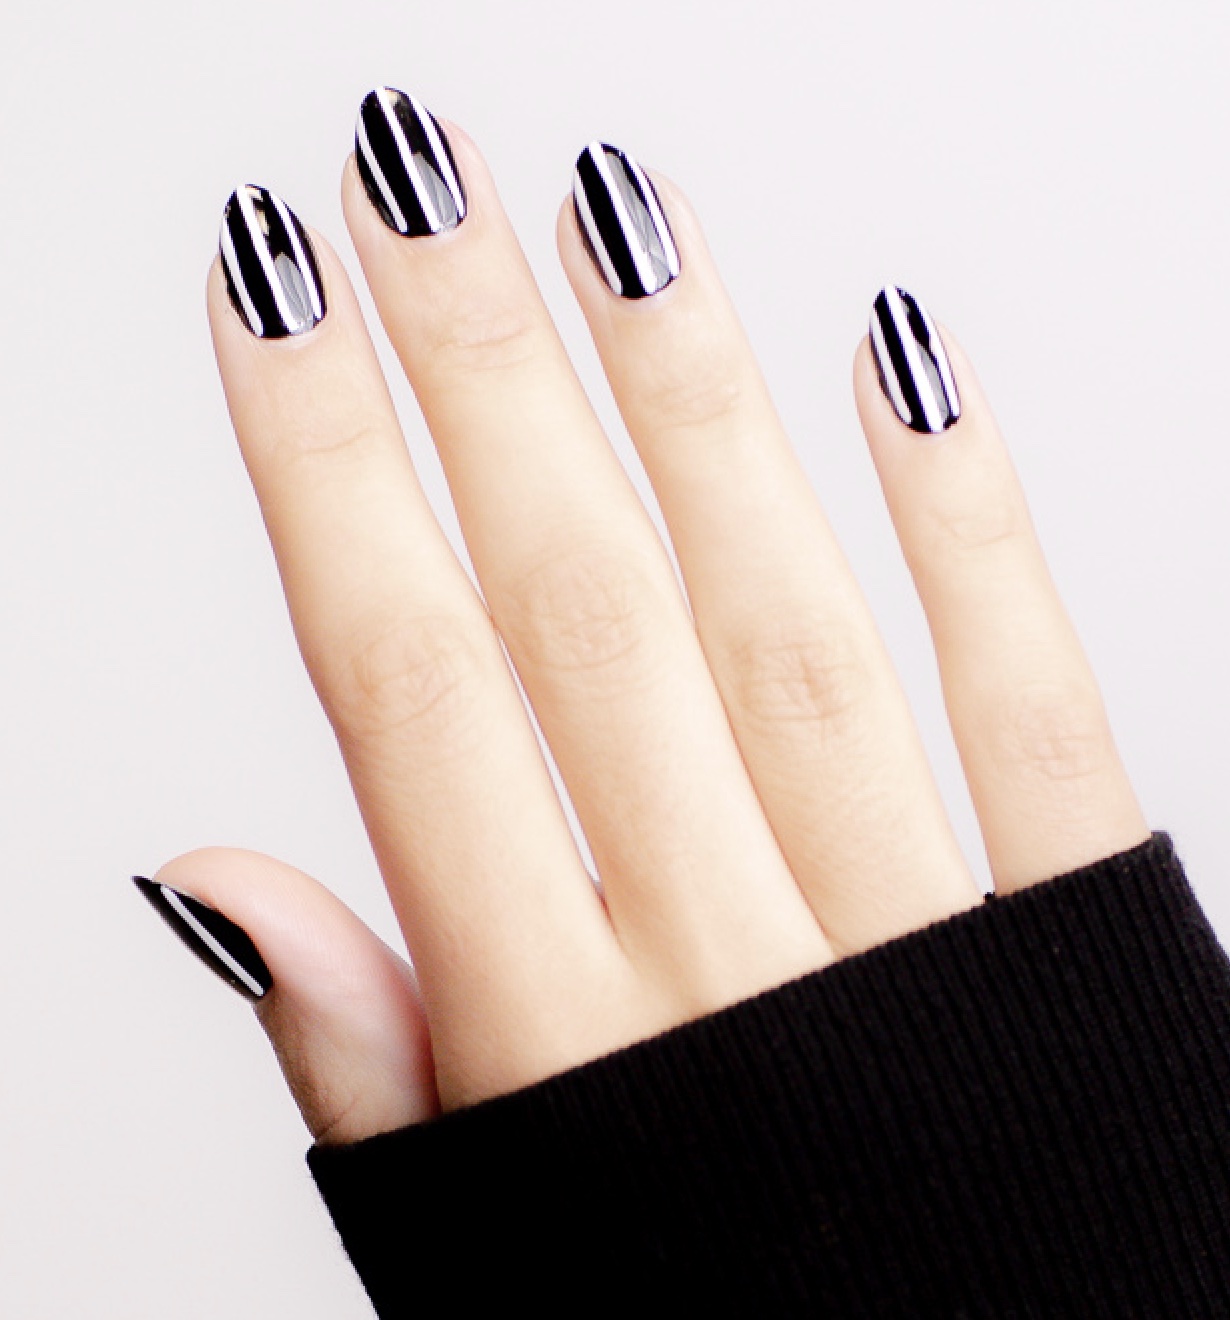
“For our nail lovers who enjoy a more simple look, but are wanting to try something different this spooky season, we recommend this fun black and white stripe look. After you’ve completed your cuticle care, you can begin creating this look by shaping your nails into an almond shape.
Apply two coats of your favorite black polish – we chose OPI’s Black Onyx. A few other black polishes we love are OPI We’re In The Black, Essie Licorice, and Ella+Mila Lights Out. Please ensure you allow some dry time in between coats to ensure an even polish application! Once these have dried, take a thin brush and apply a straight white line in the middle of your nail by dragging the brush from bottom to top, repeating this step on the left and right side of your nail bed. Complete these same steps on the rest of your nails, and add a second coat of white polish to make that pinstripe effect pop. Finish off with a top coat for the perfect glossy effect.”
Black with Witchcraft Star Design
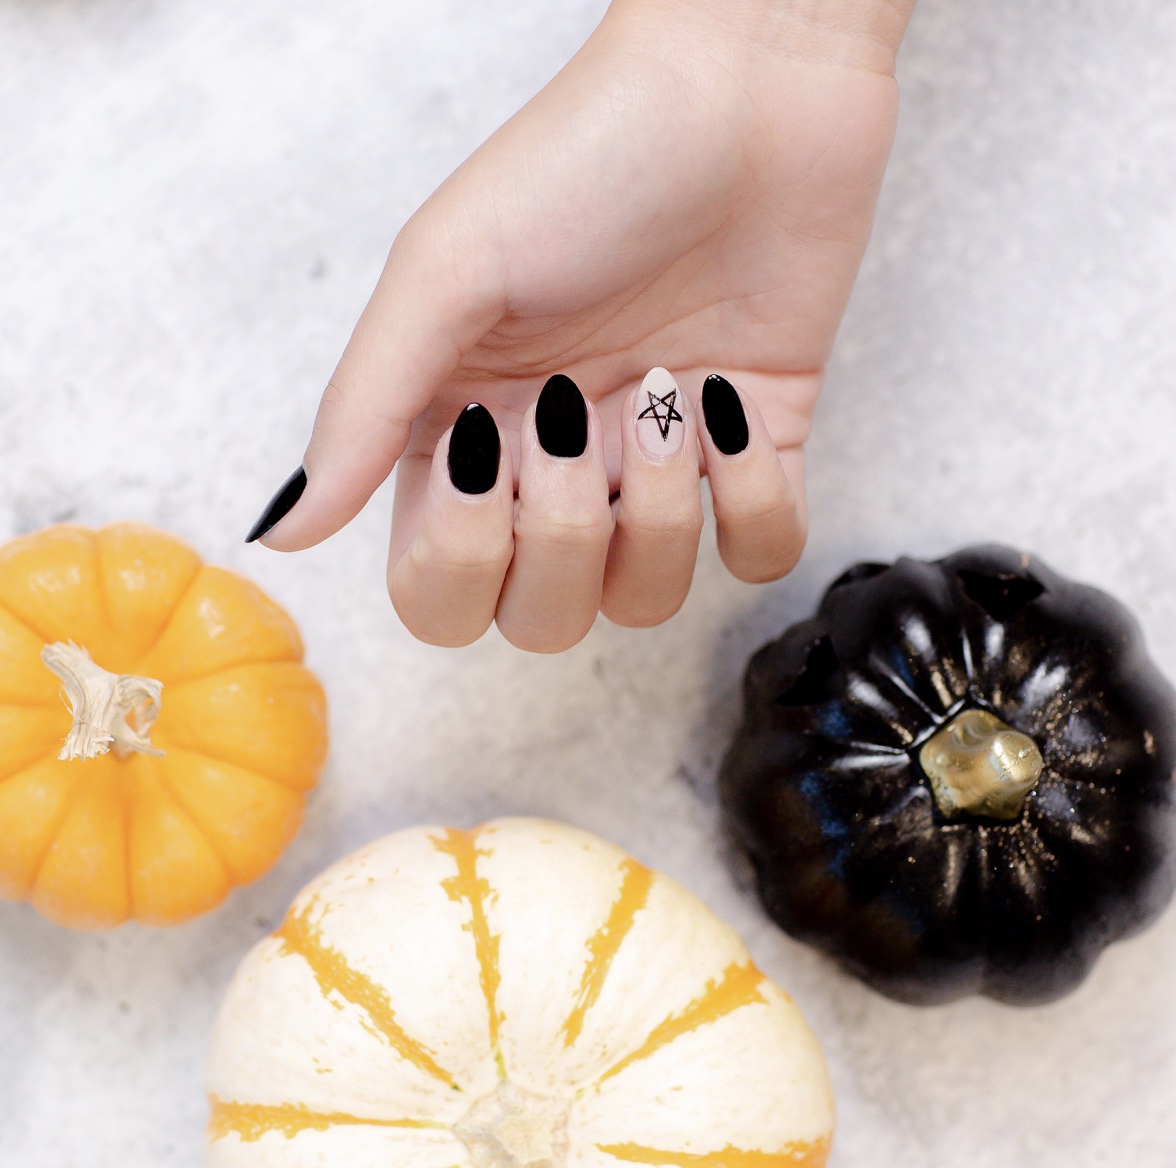
“After completing your cuticle care, shape your nails into the universally flattering almond shape. Begin by applying two coats of your favorite black polish to each of your nails aside from your ring finger – we used Dazzle Dry Midnight Express.
Next take the nude polish that fits your skin tone best, and apply two coats to your ring finger.
A couple of nude polishes we love that flatter a wide range of skin tones are, OPI Tiramisu for Two, OPI Samoan Sands, and Essie Lighten the Mood. Once these coats have dried, take a thin brush with black polish and draw an upside down triangle, leaving the bottom of the triangle open ended. Repeat this step by drawing a sideways triangle in the middle of the nail bed, and finish by connecting the triangles together to complete the star. For maximum shine finish off the look with a top coat.”


